
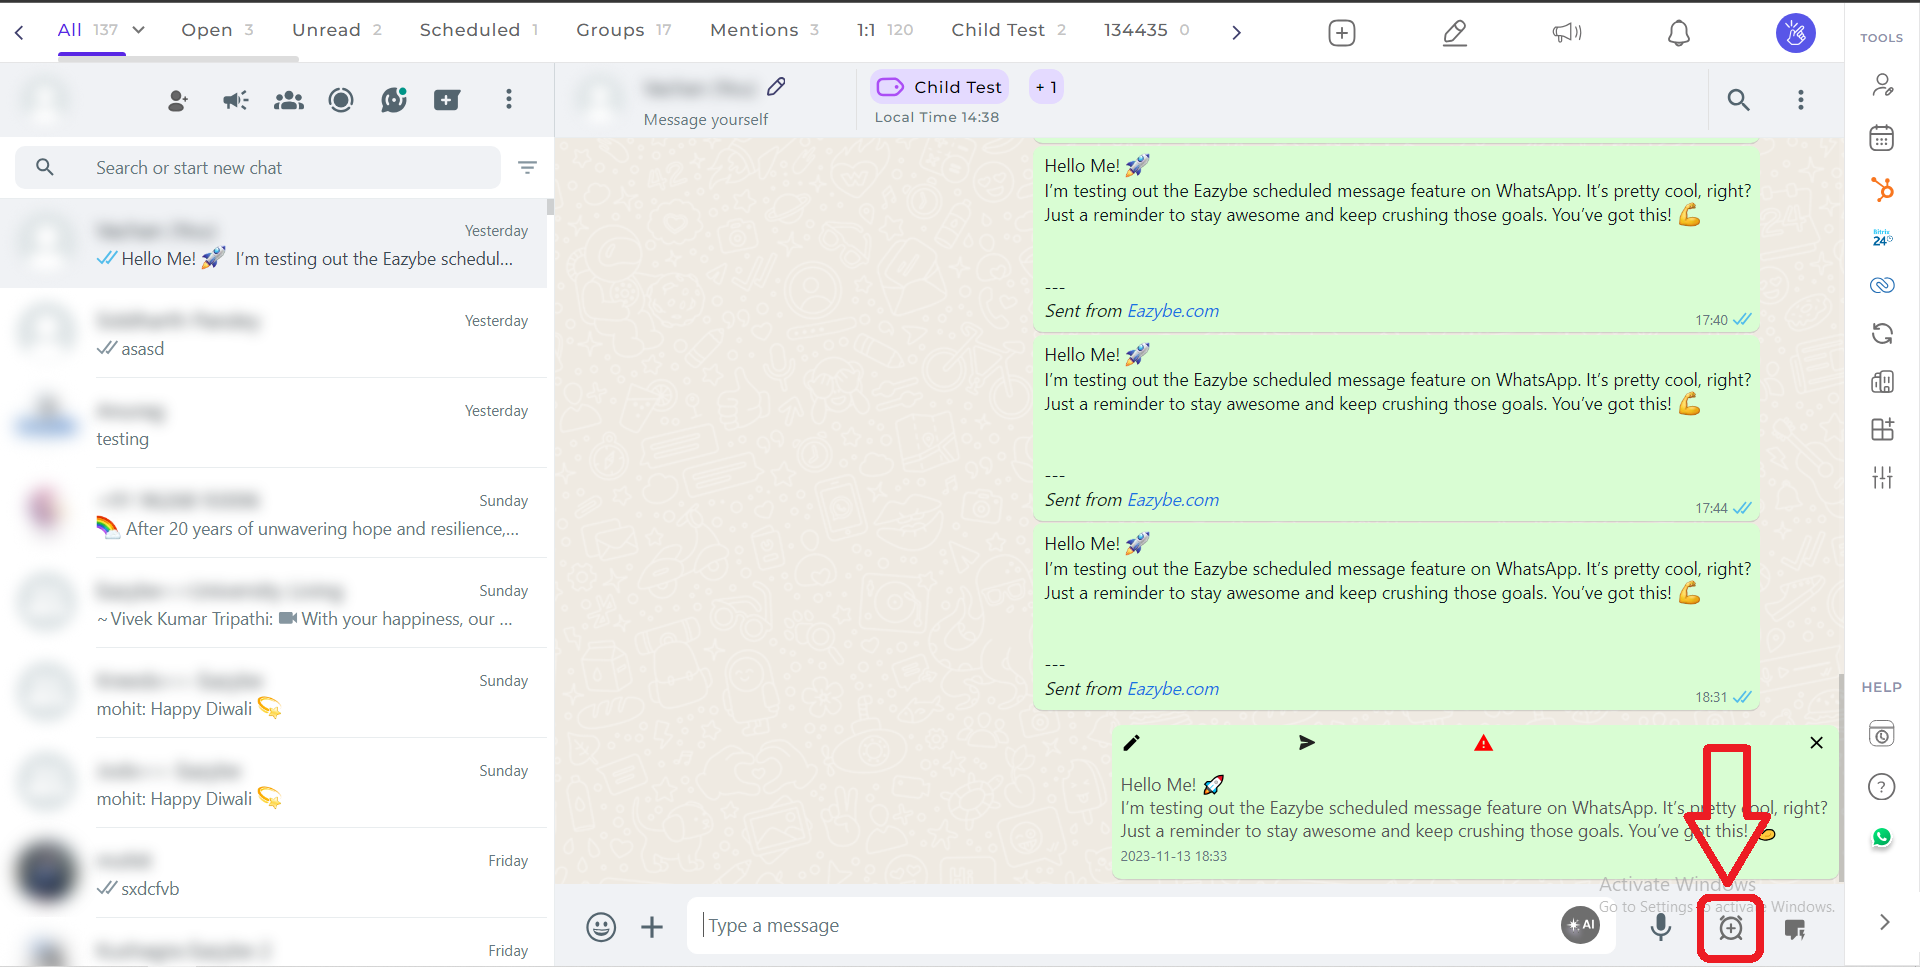
Step 1: Click on the Scheduler button as shown below
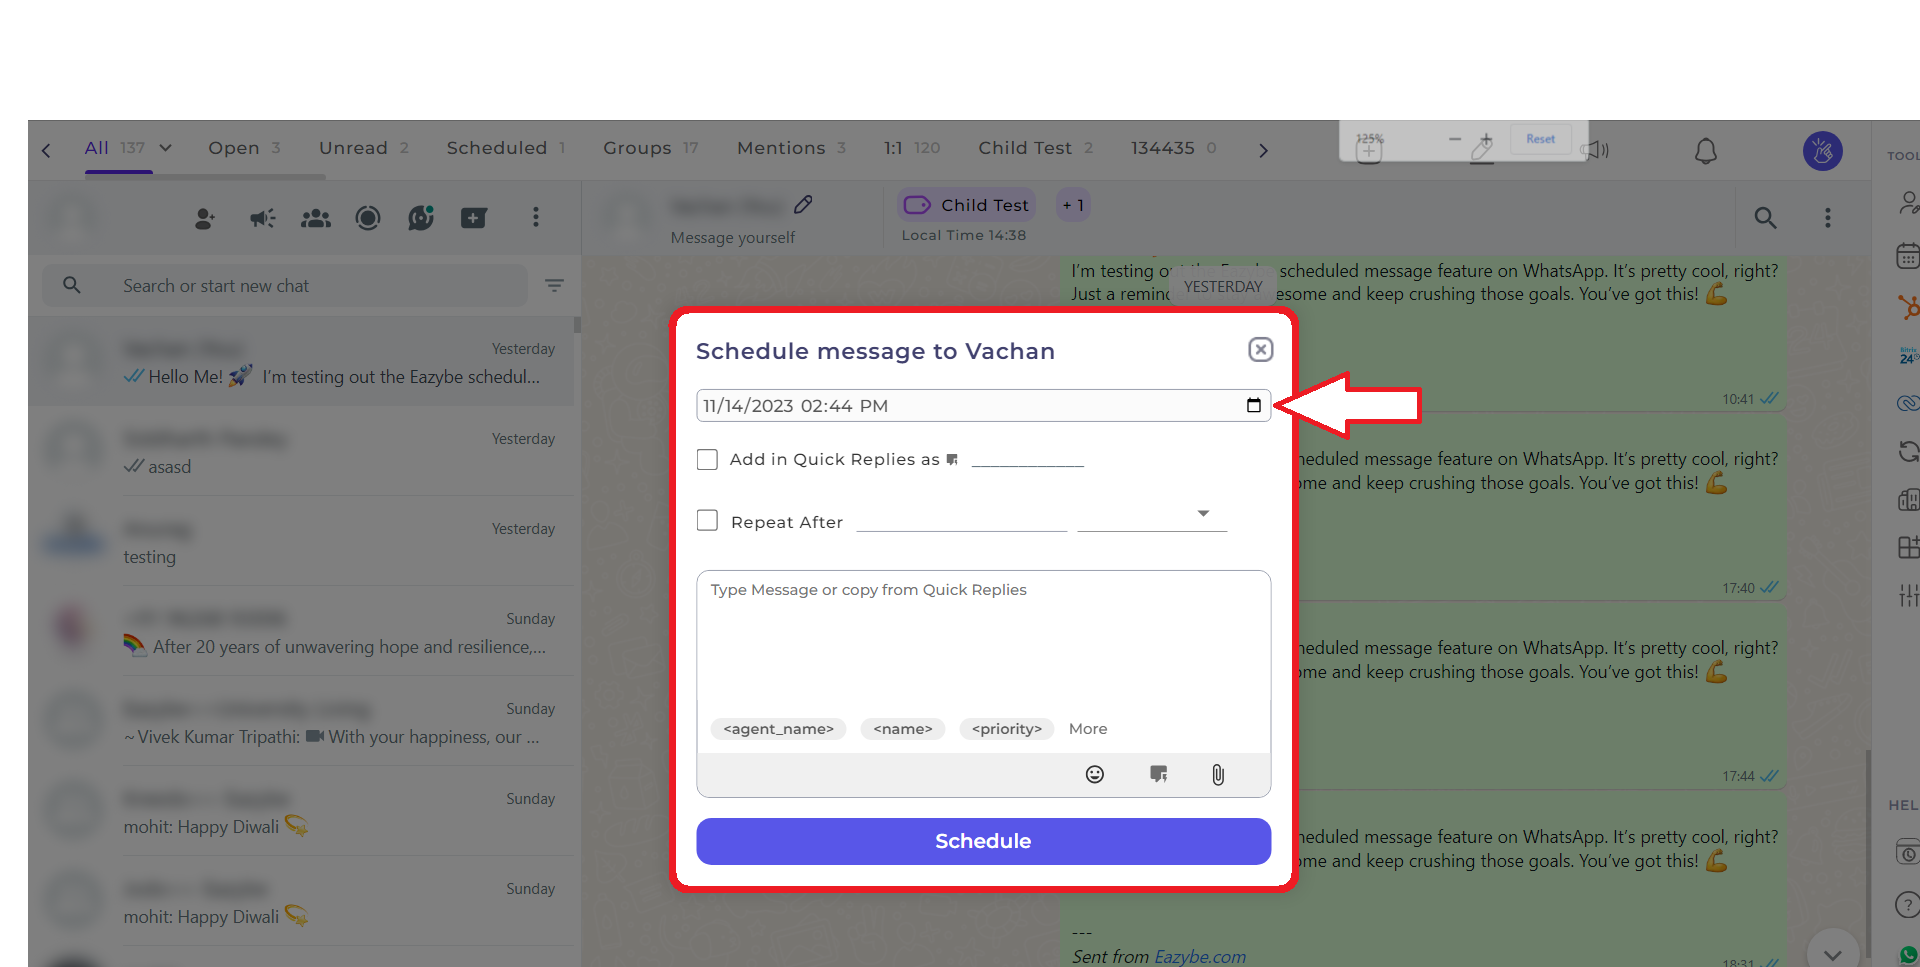
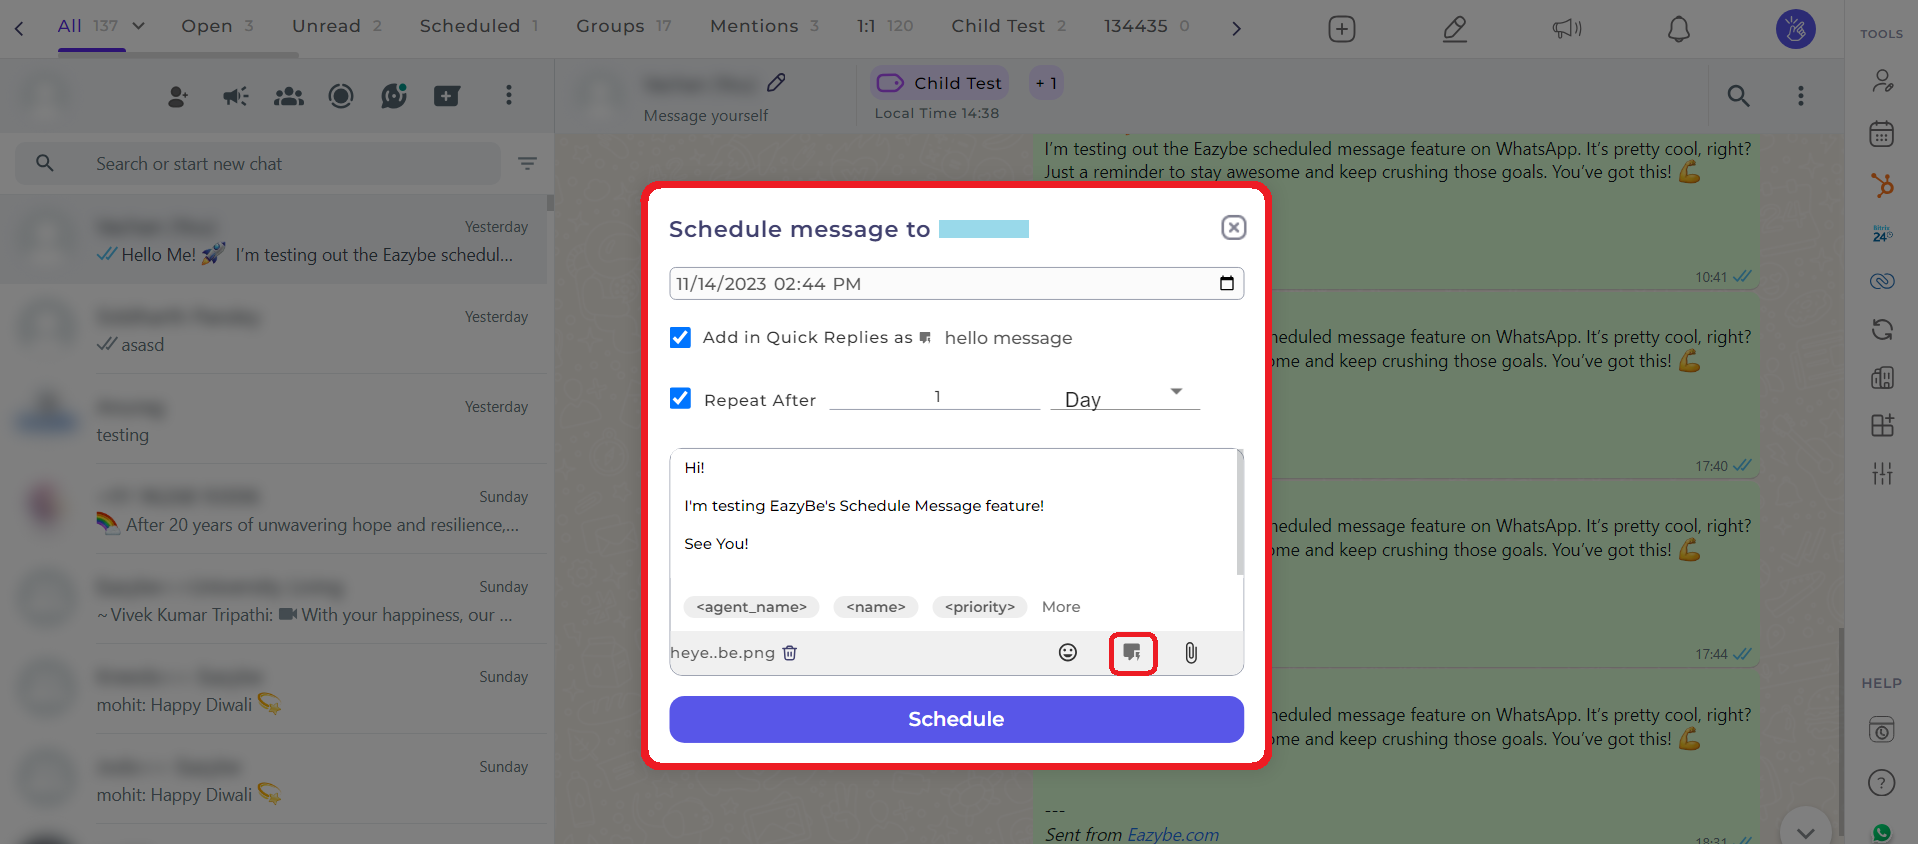
Step 2: Set a Date and Time to schedule the message.
Step 3: Optional. Add the composed message in your Quick Replies for ease of access.
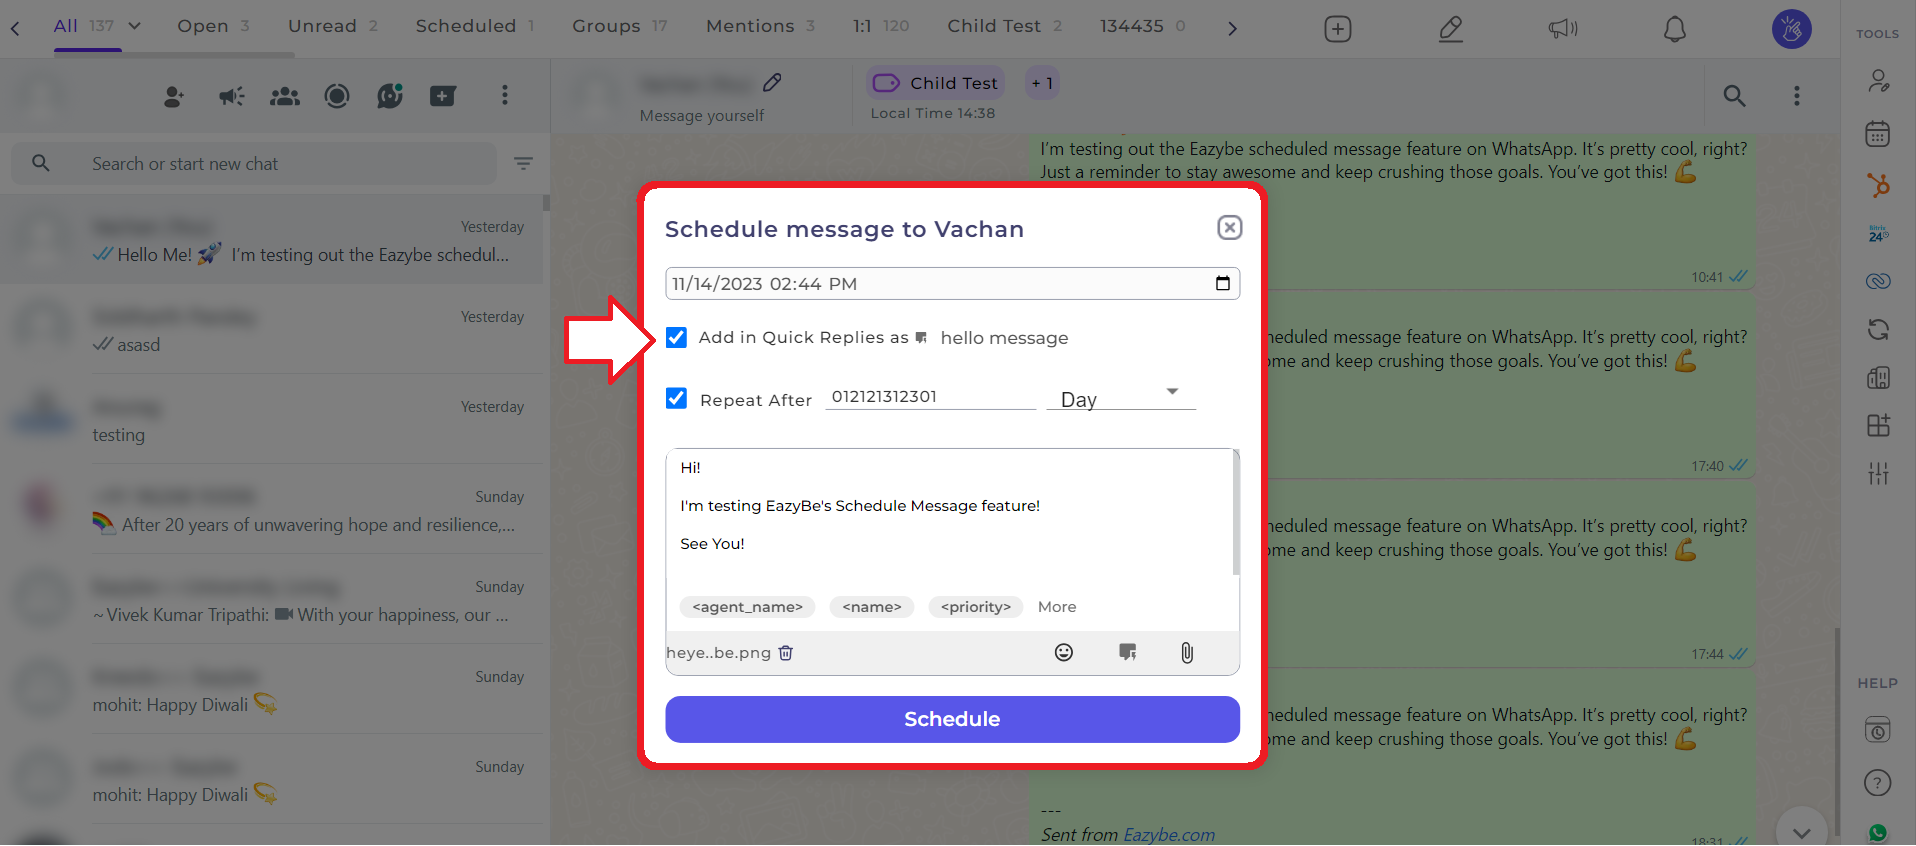
Step 4 : Optional. Set it as a Recurring Message. You can set it to be repeated on the basis of Days, Weeks, Months and Years.

Step 5: Add the text to be composed in your message. Skip to Step 7 if the message is already in your Quick Replies
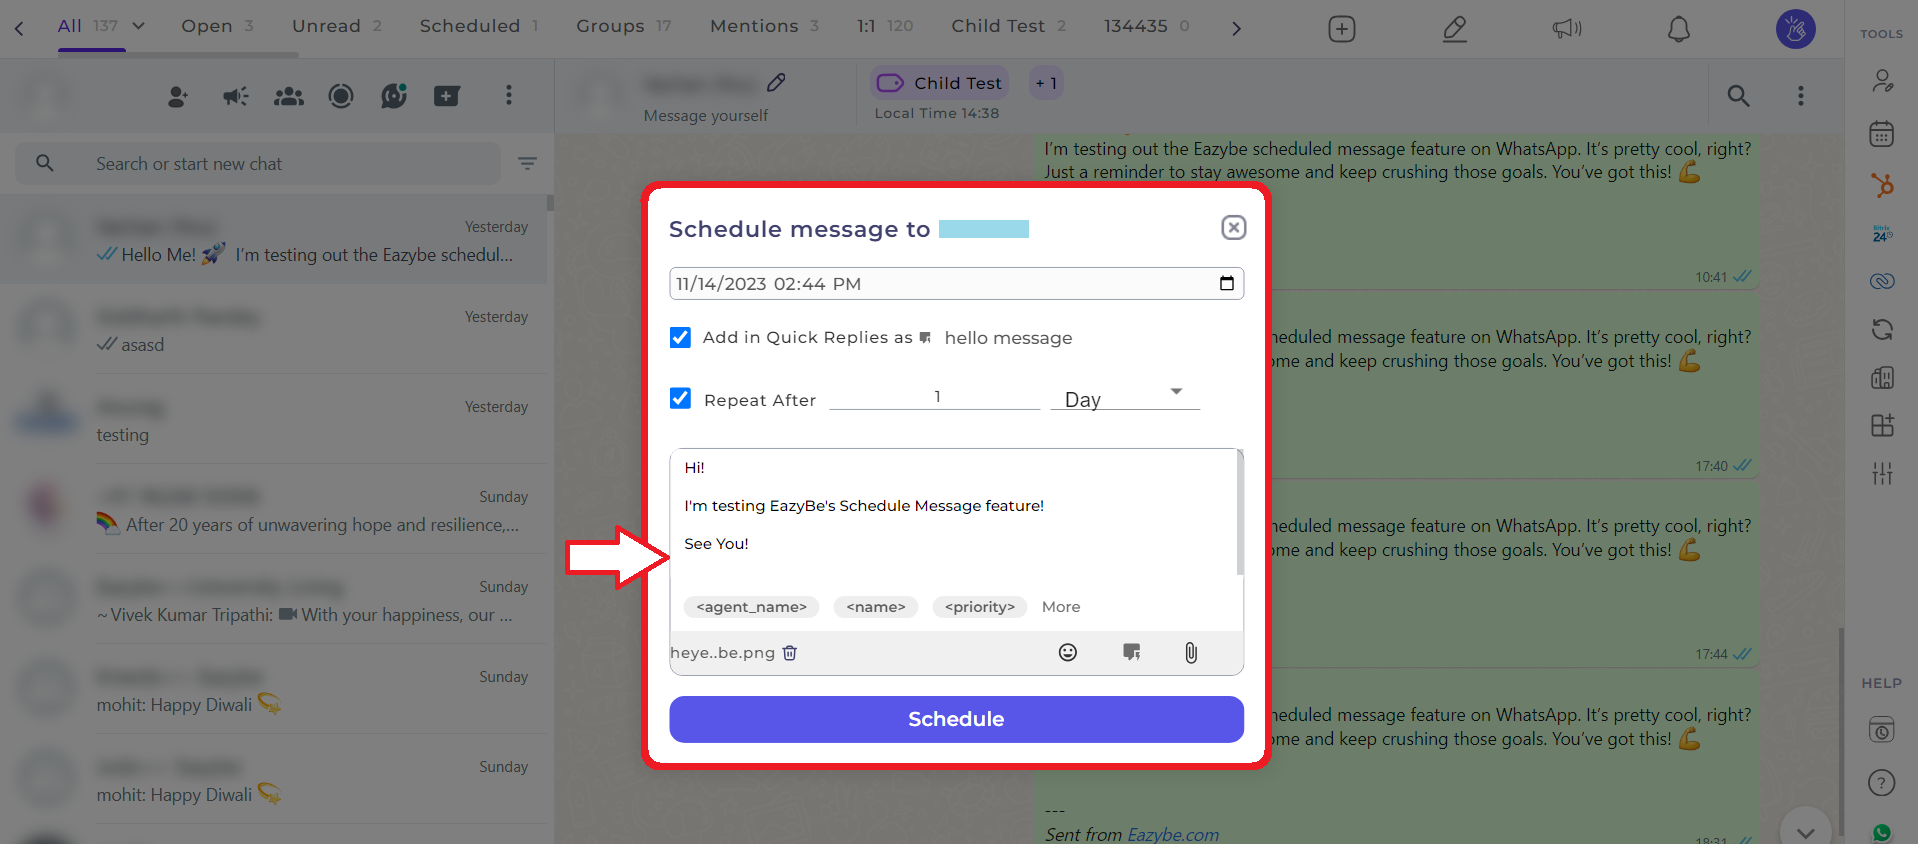
Step 6: You have the option to include attachments in the scheduled message
Note: File size cannot exceed 20 MB. Only one file can be attached.

Step 7: Add a Quick Reply instead of manually composing your message.
That’s it! Here is what it looks like. You can also edit the message and sent it immediately by clicking on the send button
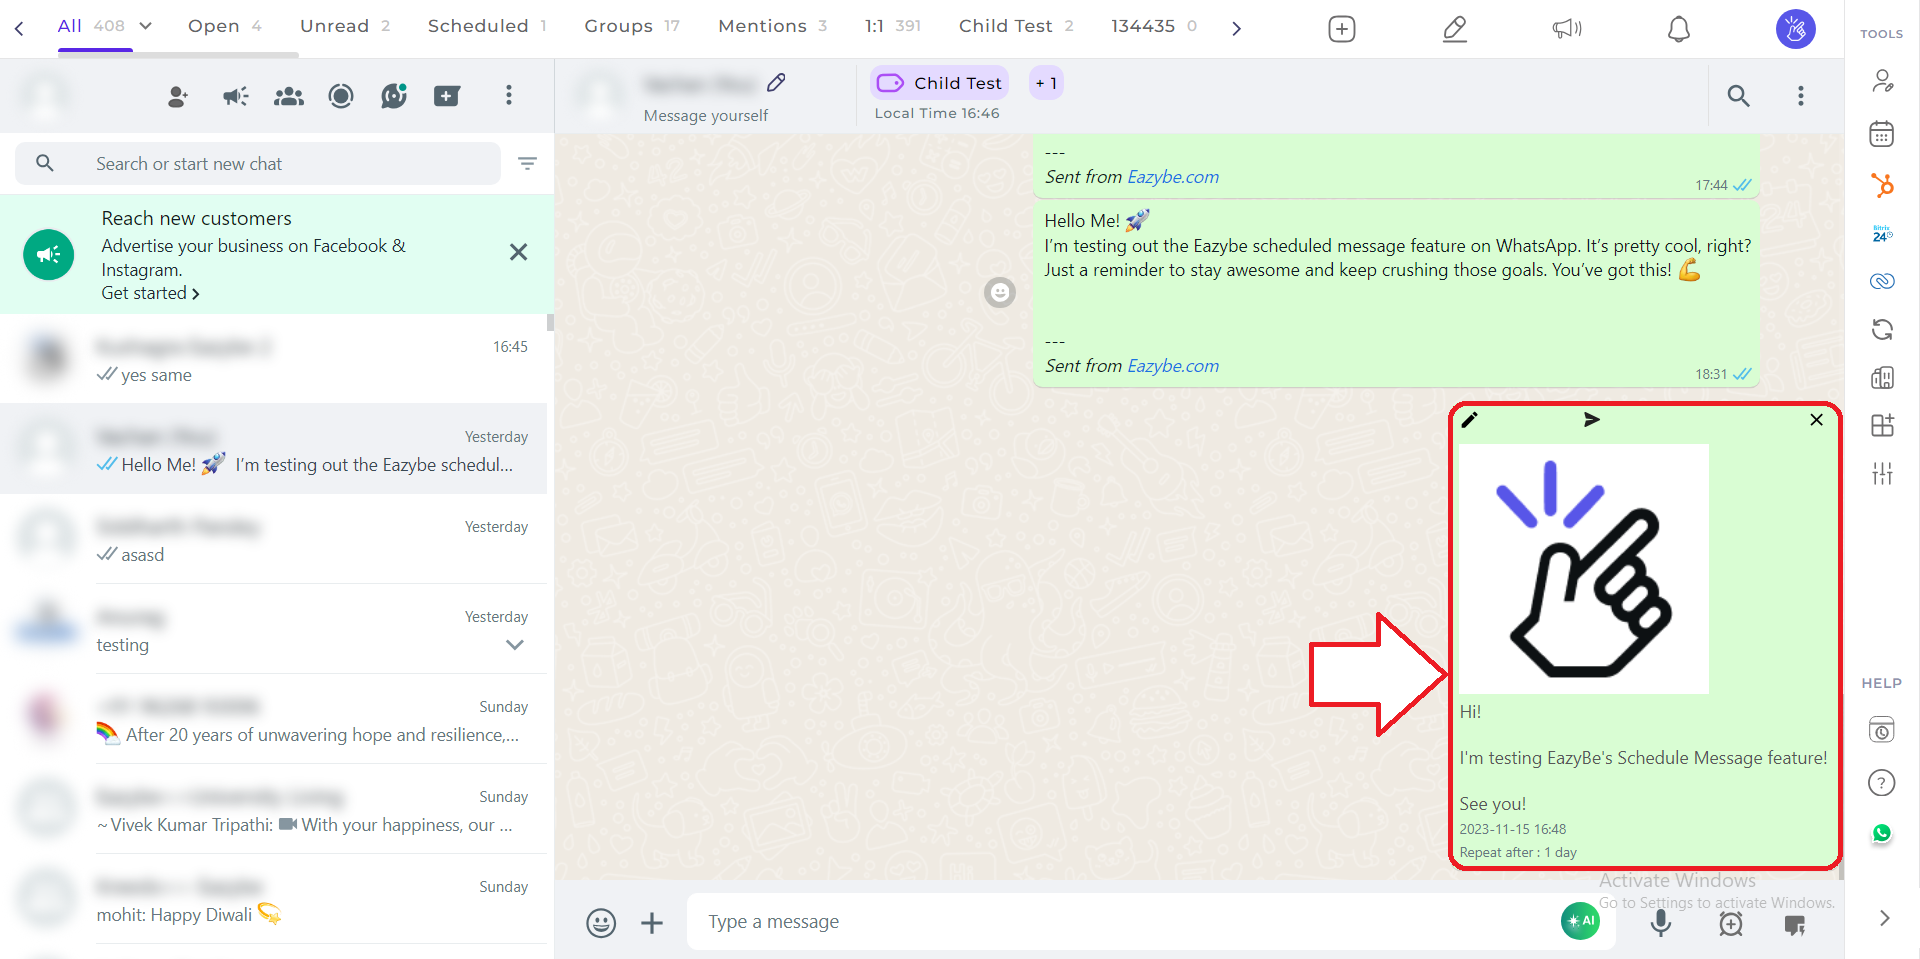
Note: WhatsApp Web needs to be active to send the scheduled messages.
Frequently Asked Questions (FAQs)
- Is it mandatory to add the composed message to Quick Replies for scheduling?
No, adding the message to Quick Replies is optional. It is provided for ease of access, allowing you to quickly select pre-composed messages during scheduling.
- What is the file attachment limit for scheduled messages?
The file size for attachments in scheduled messages cannot exceed 20mb, and only one file can be attached.
- Can I edit a scheduled message before sending it?
Yes, you can edit the scheduled message before sending it. Additionally, you have the option to send it immediately by clicking on the send button.
- Can I view or edit scheduled messages after they have been set?
Yes, you can view and edit scheduled messages. The interface allows you to manage and make changes to scheduled messages as needed.
- How can I set a message as a Recurring Message?
In Step 4, you have the option to set the message as a Recurring Message. Choose the frequency - Days, Weeks, Months, or Years - to repeat the scheduled message.